ZX Raspberry

A bare metal ZX Spectrum emulator for Raspberry Pi
Welcome to ZX Raspberry
ZX Raspberry is a bare metal Sinclair ZX Spectrum emulator for the Raspberry Pi, that is, an emulator that runs natively on the Raspberry Pi hardware without the need for an operating system.
The bare metal approach to emulation has a number of benefits as well as drawbacks. The benefits include the ability to start the emulator in about 2.5 seconds as well as having complete control over the hardware without having to share it with other operating system or user processes.
The biggest drawback is that the emulator needs to implement many of the features that are normally provided by the operating system and developing software for the bare metal is significantly harder and more time-consuming.
Although primarily targeted at the Raspberry Pi family of computers, ZX Raspberry is also intended to compile and run natively on macOS using the Qt library.
Setting-up a development environment
Overview
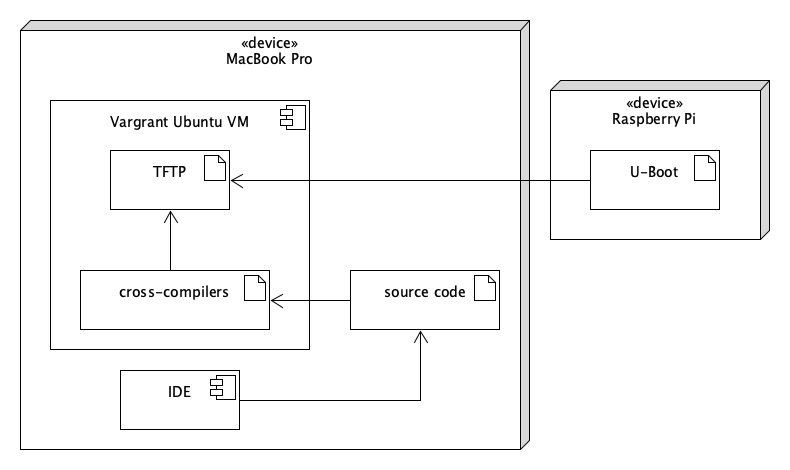
The first step in the development of our emulator is the creation of a consistent development environment that can be built easily and repeatably from scratch in just a few minutes and on as many platforms as possible. To achieve this, we will be using HashiCorp’s Vagrant and RedHat’s Ansible. The former creates the virtual machine on which our development environment will be hosted and the latter configures the actual development environment inside the virtual machine. In our particular setup, Vagrant will be using VirtualBox as the virtualization engine.

We will also be using U-Boot together with a TFTP server, the latter running inside the Vagrant virtual machine, to deploy out emulator’s cross-compiled code to the Raspberry Pi over the network thus avoiding the need for swapping SD cards.
Building the Vagrant Box
NOTE: at the time of writing, our default Vagrant and Ansible configurations target the Raspberry Pi 4 as the destination device for cross compilation. Future versions will build an environment suitable for all Raspberry Pi models simultaneously.
Getting started
On macOS, the tools required to build the cross-compilation development environment for Raspberry Pi can be easily installed using the brew package manager. e.g.
echo
echo "Installing VirtualBox"
brew cask install virtualbox

echo
echo "Installing the VirtualBox extension pack"
brew install --cask virtualbox-extension-pack

echo
echo "Installing Vagrant"
brew cask install vagrant

# (optional) delete the installation of curl bundled with Vagrant if it causes problems when initialising Vagrant boxes
sudo rm -f /opt/vagrant/embedded/bin/curl

echo "Installing Vagrant's VirtualBox guest plug-in (https://github.com/dotless-de/vagrant-vbguest)"
vagrant plugin install vagrant-vbguest

echo "Installing the Ansible infrastructure tool"
brew install ansible
Running Vagrant and Ansible
The vagrant configuration file required to create the development environment is located in the vagrant folder of the ZX Raspberry project.
To create a Vagrant box (i.e. linux virtual machine) with a fully configured development environment, open a command shell in tge vagrant folder and run this command:
vagrant up
If the operation is successful, you will see output similar to this after a few minutes:
No SSH key found. You will need to remedy this before pushing to the repository.
Bringing machine 'raspberry-pi-cross-compiler' up with 'virtualbox' provider...
==> raspberry-pi-cross-compiler: Importing base box 'ubuntu/xenial64'...
==> raspberry-pi-cross-compiler: Matching MAC address for NAT networking...
==> raspberry-pi-cross-compiler: Checking if box 'ubuntu/xenial64' version '20191204.0.0' is up to date...
==> raspberry-pi-cross-compiler: Setting the name of the VM: circle_raspberry-pi-cross-compiler_1575832766177_12344
==> raspberry-pi-cross-compiler: Clearing any previously set network interfaces...
==> raspberry-pi-cross-compiler: Preparing network interfaces based on configuration...
    raspberry-pi-cross-compiler: Adapter 1: nat
==> raspberry-pi-cross-compiler: Forwarding ports...
    raspberry-pi-cross-compiler: 22 (guest) => 2222 (host) (adapter 1)
==> raspberry-pi-cross-compiler: Running 'pre-boot' VM customizations...
==> raspberry-pi-cross-compiler: Booting VM...
==> raspberry-pi-cross-compiler: Waiting for machine to boot. This may take a few minutes...
    raspberry-pi-cross-compiler: SSH address: 127.0.0.1:2222
    raspberry-pi-cross-compiler: SSH username: vagrant
    raspberry-pi-cross-compiler: SSH auth method: private key
    raspberry-pi-cross-compiler:
    raspberry-pi-cross-compiler: Vagrant insecure key detected. Vagrant will automatically replace
    raspberry-pi-cross-compiler: this with a newly generated keypair for better security.
    raspberry-pi-cross-compiler:
    raspberry-pi-cross-compiler: Inserting generated public key within guest...
    raspberry-pi-cross-compiler: Removing insecure key from the guest if it's present...
    raspberry-pi-cross-compiler: Key inserted! Disconnecting and reconnecting using new SSH key...
==> raspberry-pi-cross-compiler: Machine booted and ready!
==> raspberry-pi-cross-compiler: Checking for guest additions in VM...
    raspberry-pi-cross-compiler: The guest additions on this VM do not match the installed version of
    raspberry-pi-cross-compiler: VirtualBox! In most cases this is fine, but in rare cases it can
    raspberry-pi-cross-compiler: prevent things such as shared folders from working properly. If you see
    raspberry-pi-cross-compiler: shared folder errors, please make sure the guest additions within the
    raspberry-pi-cross-compiler: virtual machine match the version of VirtualBox you have installed on
    raspberry-pi-cross-compiler: your host and reload your VM.
    raspberry-pi-cross-compiler:
    raspberry-pi-cross-compiler: Guest Additions Version: 5.1.38
    raspberry-pi-cross-compiler: VirtualBox Version: 6.0
==> raspberry-pi-cross-compiler: Setting hostname...
==> raspberry-pi-cross-compiler: Mounting shared folders...
    raspberry-pi-cross-compiler: /vagrant => /Users/jose.hernandez/Developer/doraemoncito/emulators/vagrant/circle
==> raspberry-pi-cross-compiler: Running provisioner: shell...
    raspberry-pi-cross-compiler: Running: inline script
==> raspberry-pi-cross-compiler: Running provisioner: shell...
    raspberry-pi-cross-compiler: Running: inline script
    raspberry-pi-cross-compiler: SSH keys already provisioned.
==> raspberry-pi-cross-compiler: Running provisioner: ansible_local...
    raspberry-pi-cross-compiler: Installing Ansible...
Vagrant has automatically selected the compatibility mode '2.0'
according to the Ansible version installed (2.9.2).

Alternatively, the compatibility mode can be specified in your Vagrantfile:
https://www.vagrantup.com/docs/provisioning/ansible_common.html#compatibility_mode

    raspberry-pi-cross-compiler: Running ansible-playbook...
cd /vagrant && PYTHONUNBUFFERED=1 ANSIBLE_FORCE_COLOR=true ansible-playbook --limit="all" --inventory-file=hosts -v provision.yml
Using /vagrant/ansible.cfg as config file

PLAY [all] *********************************************************************

TASK [Gathering Facts] *********************************************************
ok: [192.168.33.10]

...

PLAY RECAP *********************************************************************
192.168.33.10              : ok=11   changed=10   unreachable=0    failed=0    skipped=0    rescued=0    ignored=0
To run the provisioning scripts again after creating the Vagrant box, run this command:
vagrant up --provision
Log into the box with:
vagrant ssh
Deleting the virtual machine
Use the following command to forcibly delete the virtual machine and release the disk space;
vagrant destroy --force
Upon successful completion, a message like this will appear on the terminal:
No SSH key found. You will need to remedy this before pushing to the repository.
==> raspberry-pi-cross-compiler: Forcing shutdown of VM...
==> raspberry-pi-cross-compiler: Destroying VM and associated drives...
Cross-compiler toolchains
| Raspberry Pi model | Bus width | CMake toolchain configuration file | Prefix | Cross-compiler destribution file |
|---|---|---|---|---|
| 1 | 32 bits | toolchain-arm-eabi.cmake | arm-eabi- | gcc-arm-8.2-2019.01-x86_64-arm-eabi.tar.xz |
| 0, 1, 2, 3, 4 | 32 bits | toolchain-arm-none-eabi.cmake | arm-none-eabi- | gcc-arm-9.2-2019.12-x86_64-arm-none-eabi.tar.xz |
| 4 | 64 bits | toolchain-arm-aarch64-elf.cmake | aarch64-elf- | gcc-arm-8.3-2019.03-x86_64-aarch64-elf.tar.xz |
Please note that arm-eabi is deprecated and arm-none-eabi should instead be used for all 32 bit targets, including the original Raspberry Pi.
Building U-Boot
NOTE: many of the step described in this section will be performed automatically during the development environment installation using Ansible.
Memory Layout
0x0000 0000
      :
0x0000 8000     Kernel entry point (32 bit variant)
      :
0x0100 0000     U-Boot boot script stage 1
      :
0x0110 0000     U-Boot boot script stage 2
      :
0x23EF 3000     Flattened device tree blob (size 0xCFDA = 53210, e.g. < 64K)
      :
0xFFFF FFFF     End of memory (4GB)
Cross-compiling Das U-boot
Install the pre-requisites:
sudo apt-get install -y bison flex
Check-out of the source code:
git clone git://git.denx.de/u-boot.git
cd u-boot
These are the 32 kernel image names grouped by Raspberry Pi model:
| RASPPI | Target | Models | Optimized for |
|---|---|---|---|
| 1 | kernel.img | A, B, A+, B+, Zero, (CM) | ARM1176JZF-S |
| 2 | kernel7.img | 2, 3, (CM3) | Cortex-A7 |
| 3 | kernel8-32.img | 3, (CM3) | Cortex-A53 |
| 4 | kernel7l.img | 4B, 400, CM4 | Cortex-A72 |
Next, set the default configuration. This will vary depending upon the Raspberry Pi variant you wish to target:
| Raspberry Pi Variant | Processor | Kernel image | Configuration File | Cross-compiler prefix |
|---|---|---|---|---|
| Raspberry Pi Model A | BCM2835 | kernel.img | rpi_defconfig | arm-none-eabi- |
| Raspberry Pi Model A+ | BCM2835 | kernel.img | rpi_defconfig | arm-none-eabi- |
| Raspberry Pi Model B+ | BCM2835 | kernel.img | rpi_defconfig | arm-none-eabi- |
| Raspberry Pi Compute Module | BCM2835 | kernel.img | rpi_defconfig | arm-none-eabi- |
| Raspberry Pi Zero | BCM2835 | kernel.img | rpi_defconfig | arm-none-eabi- |
| Raspberry Pi Zero W | BCM2835 | kernel.img | rpi_0_w_defconfig | arm-none-eabi- |
| Raspberry Pi 2 Model B | BCM2836 | kernel7.img | rpi_2_defconfig | arm-none-eabi- |
| Raspberry Pi 3 Model B | BCM2837 | kernel8-32.img | rpi_3_32b_defconfig | arm-none-eabi- |
| Raspberry Pi 3 Model B+ | BCM2837B0 | kernel8-32.img | rpi_3_32b_defconfig | arm-none-eabi- |
| Raspberry Pi 4 Model B+ (32 bits) | BCM2711B0 | kernel7l.img | rpi_4_32b_defconfig | arm-none-eabi- |
| Raspberry Pi 4 Model B+ (64 bits) | BCM2711B0 | kernel8.img | rpi_4_defconfig | aarch64-elf- |
For more detailed hardware information please see the Raspberry Pi specifications on Wikipedia.
For example, if we wish to target the Raspberry Pi Model B+, we run the following command to configure the U-Boot build:
make CROSS_COMPILE=arm-none-eabi- rpi_defconfig
and finally compile U-Boot with this command:
make CROSS_COMPILE=arm-none-eabi- u-boot.bin
Then copy the resulting u-boot.bin to the SD card and rename it kernel.img (for Raspberry Pi 1)
NOTE: Run the
ntpdatecommand to synchronise the Virtual Machine’s clock, e.g.sudo ntpdate time.nist.govif you get a warning like this when building the code:make[1]: warning: Clock skew detected. Your build may be incomplete.
The following script compiles a set of five U-Boot kernel images which can all be placed simultaneously on the same SD card to boot on any Raspberry Pi model to date.
echo "Synchronizing the Virtual Machine's clock"
sudo ntpdate time.nist.gov

echo "Compiling U-Boot for Raspberry Pi 1 (32 bits)"
export CROSS_COMPILE=arm-none-eabi-
make -j$(expr `nproc` + 1) CROSS_COMPILE=arm-none-eabi- distclean rpi_defconfig all
file u-boot
cp u-boot.bin ../kernel.img

echo "Compiling U-Boot for Raspberry Pi 2 (32 bits)"
export CROSS_COMPILE=arm-none-eabi-
make -j$(expr `nproc` + 1) ARCH=arm CROSS_COMPILE=arm-none-eabi- distclean rpi_2_defconfig all
file u-boot
mv u-boot.bin ../kernel7.img

echo "Compiling U-Boot for Raspberry Raspberry Pi 3 Model B+ (32 bits)"
export CROSS_COMPILE=arm-none-eabi-
make -j$(expr `nproc` + 1) ARCH=arm CROSS_COMPILE=arm-none-eabi- distclean rpi_3_32b_defconfig all
file u-boot
mv u-boot.bin ../kernel8-32.img

echo "Compiling U-Boot for Raspberry Pi 4B (32 bits)"
export CROSS_COMPILE=arm-none-eabi-
make -j$(expr `nproc` + 1) ARCH=arm CROSS_COMPILE=arm-none-eabi- distclean rpi_4_32b_defconfig all
file u-boot
cp u-boot.bin ../kernel7l.img

echo "Compiling U-Boot for Raspberry Pi 4B (64 bits)"
export CROSS_COMPILE=aarch64-elf-
make -j$(expr `nproc` + 1) CROSS_COMPILE=aarch64-elf- distclean rpi_4_defconfig all
file u-boot
cp u-boot.bin ../kernel8.img
To enable U-Boot debug messages over the serial (UART) interface you will need to modify the the config.txt file on the root of the SD card used to boot and modify or append the following line:
enable_uart=1
The bottom few lines of the final configuration may look something like this:
...

[pi4]
# Enable DRM VC4 V3D driver on top of the dispmanx display stack
dtoverlay=vc4-fkms-v3d
max_framebuffers=2

[all]
enable_uart=1
You will also need to copy the vagrant/templates/sdcard/cmdline.txt file to the root of the SD card.
Building ZX Raspberry on macOS
cd zx-raspberry
mkdir cmake-build-macos
cd cmake-build-macos
cmake ..
make clean all
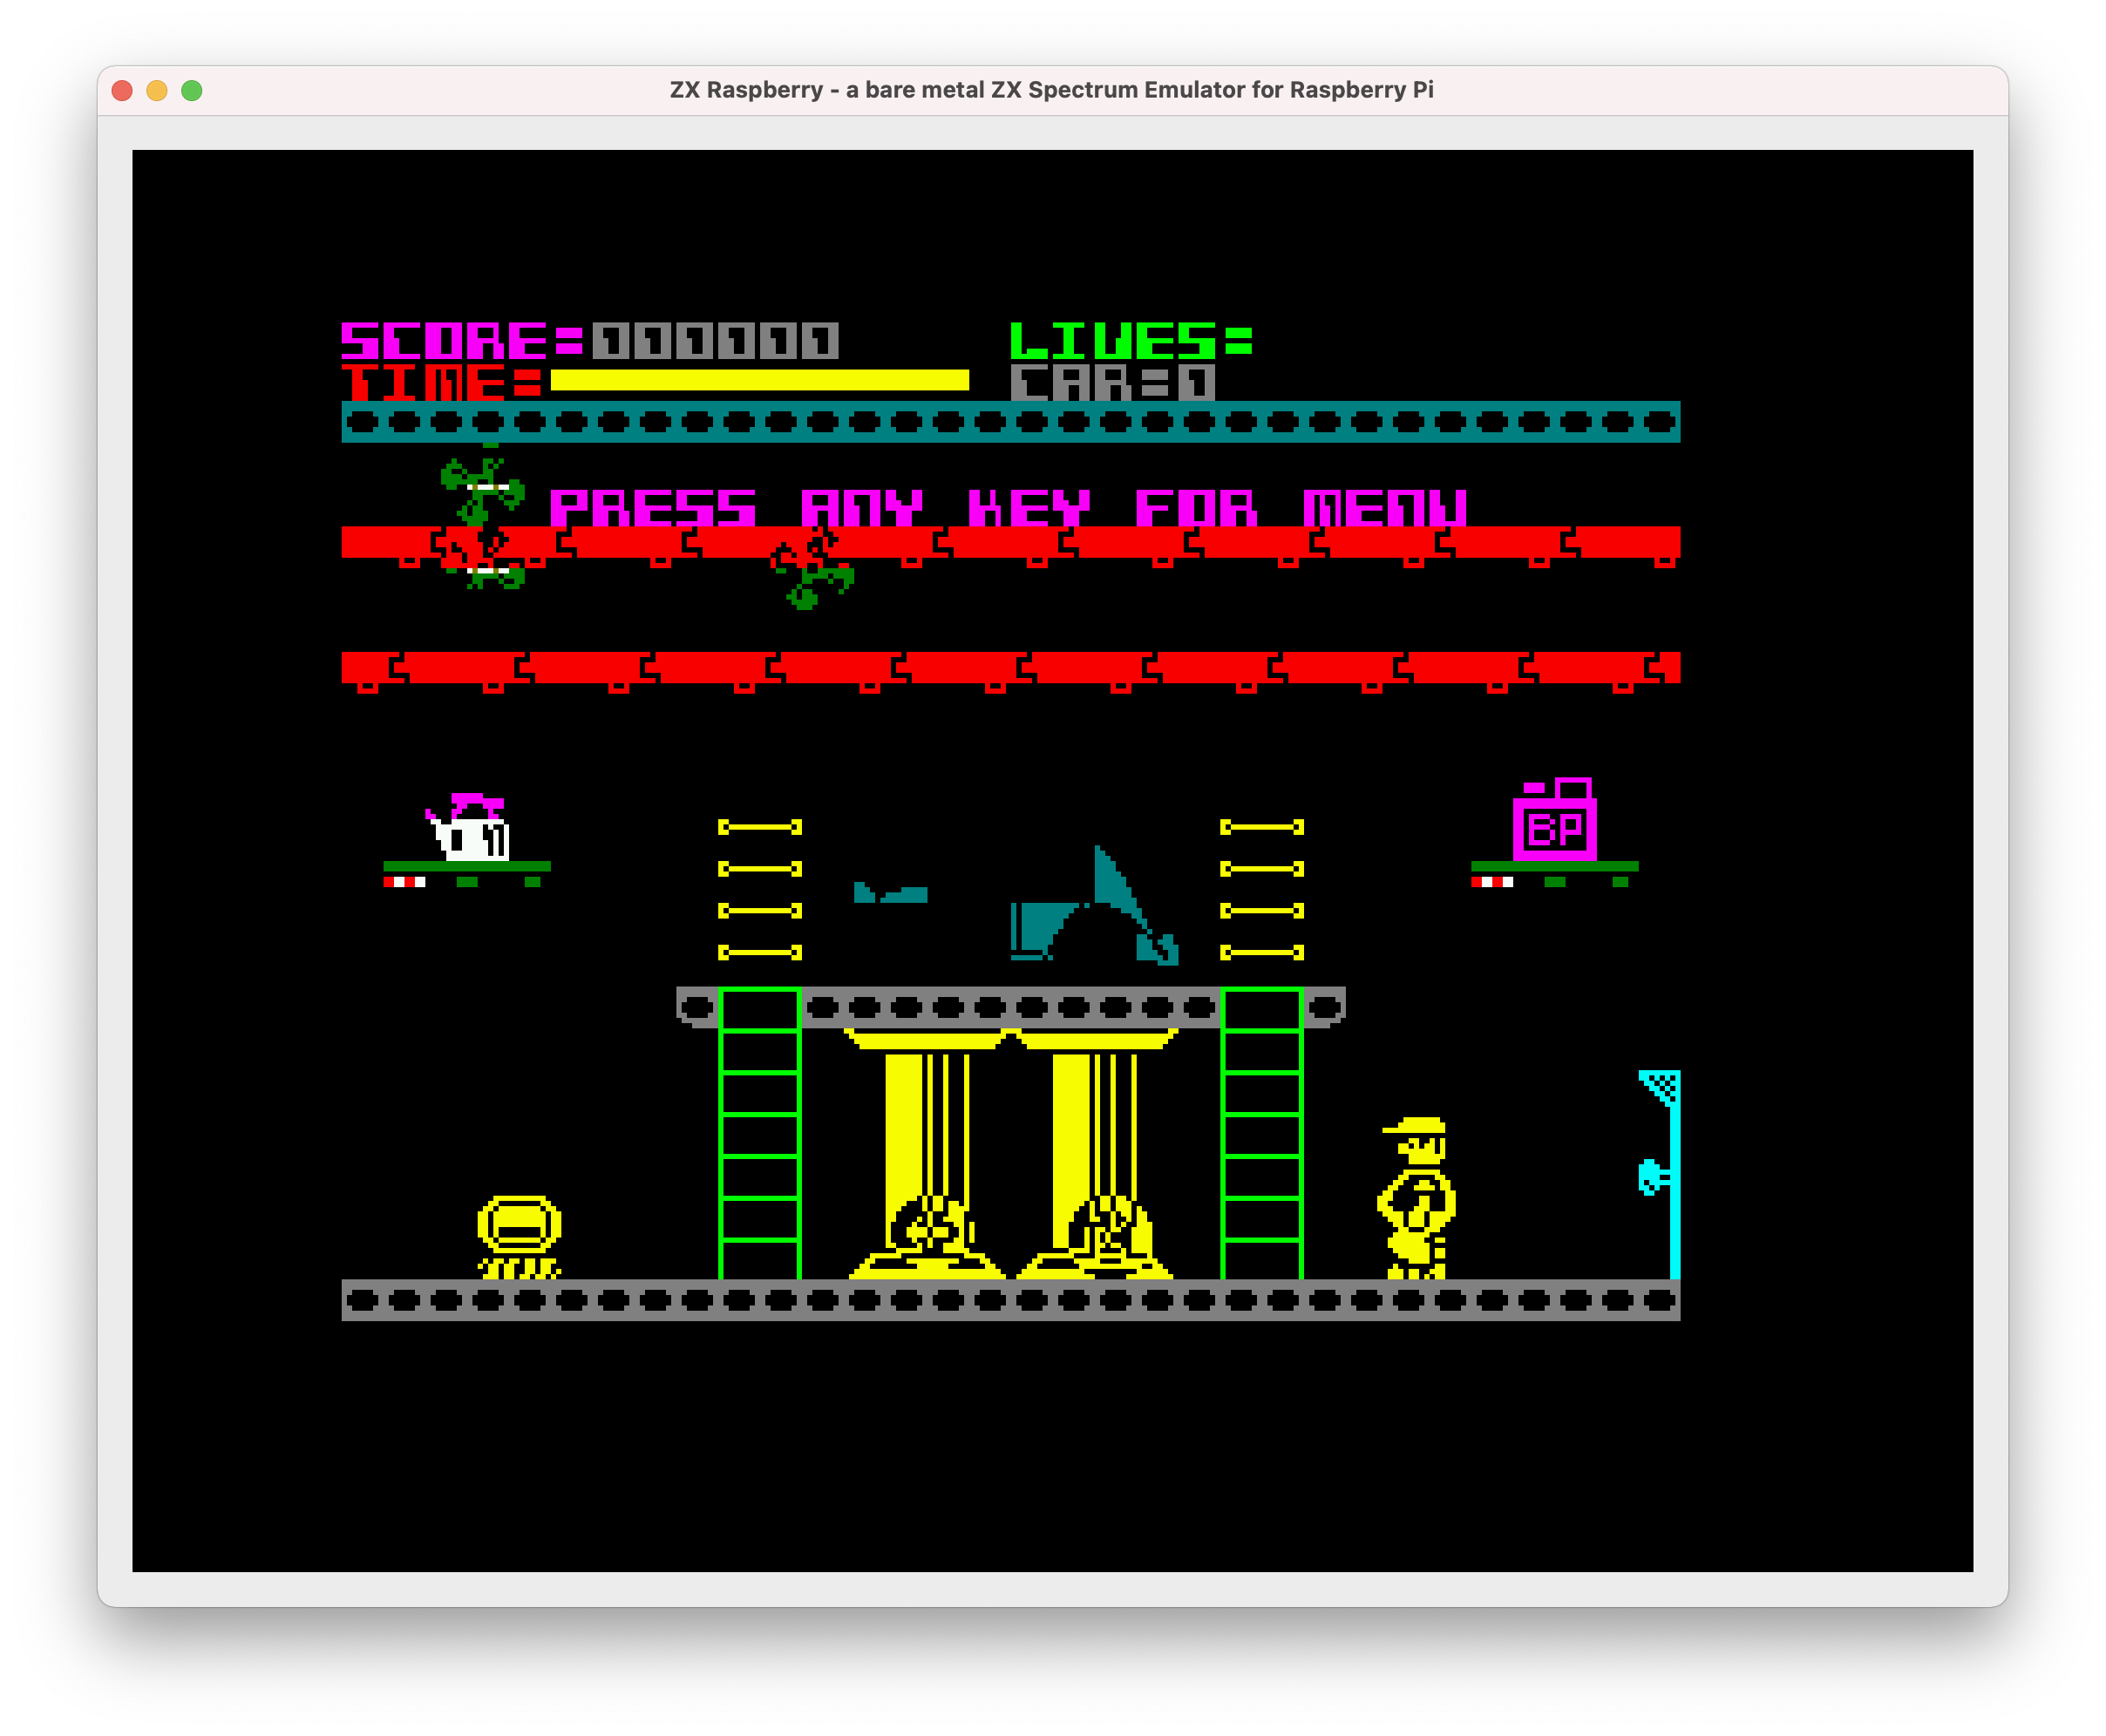
The build process generates an executable file called zxraspberry that runs in a windows as shown in the image below.

Cross-compiling the emulator for Raspberry Pi
Raspberry Pi 1
TODO:
cd zx-raspberry
mkdir cmake-build-raspi
cd cmake-build-raspi
cmake -DCMAKE_TOOLCHAIN_FILE=../cmake/toolchain-arm-none-eabi.cmake ..
make clean all
sudo cp zxraspberry.uimg /private/tftpboot/kernel.img
sudo cp zxraspberry.uimg /private/tftpboot/
The following command outputs all the variables used in the build:
cmake -DCMAKE_BUILD_TYPE=Debug -DCMAKE_TOOLCHAIN_FILE=../cmake/toolchain-arm-none-eabi.cmake ..
Raspberry Pi 4
32 bits:
cd zx-raspberry
mkdir cmake-build-raspi
cd cmake-build-raspi
cmake -DCMAKE_TOOLCHAIN_FILE=../cmake/toolchain-arm-none-eabi.cmake ..
make clean all
sudo cp zxraspberry.uimg /private/tftpboot/kernel7l.img
sudo cp zxraspberry.uimg /private/tftpboot/
TODO: 64 bits:
cd zx-raspberry
mkdir cmake-build-raspi
cd cmake-build-raspi
cmake -DCMAKE_TOOLCHAIN_FILE=../cmake/toolchain-arm-aarch64-elf.cmake ..
make clean all
sudo cp zxraspberry.uimg /private/tftpboot/kernel8.img
sudo cp zxraspberry.uimg /private/tftpboot/
Debugging over the serial port
On macOS:
minicom -c on -b 115200 -o -D /dev/tty.usbserial-AD0JRLXD
On Linux:
minicom -c on -b 115200 -o -D /dev/ttyUSB0